
AI-generated
Esterházy cake — nut layers with cream and a chocolate spiderweb
Log in or create a free account to save recipes.
Source: https://recipheon.com/en/recipes/desserts/esterhazy-cake-nut-layers-with-cream-and-a-chocolate-spiderweb
About this recipe
Esterházy cake is recognized by its pale top with a delicate chocolate spiderweb and many thin nut layers. This home version alternates six walnut layers with cooked vanilla custard beaten with butter. These are nut meringue layers, not ordinary sponge cake: gently fold finely ground nuts into the foam and bake immediately. Make three small batches, each for two layers, rather than leaving all the mixture waiting. You do not need six cake pans; parchment, two baking sheets and drawn circles are enough. The cream uses real yolks, milk and starch, with butter added only once the cooked base and butter are at similar temperatures. A thin apricot jam layer separates the top cake layer from homemade white icing. Draw the pattern while the surface is still soft by dragging a skewer through a chocolate spiral. The sides use the same walnuts, without extra decorations. Several hours of chilling set the cream and gently soften the layers, making the cake easier to slice without crumbling or crushing them.
Ingredients
Six walnut meringue layers
240 g raw egg whites without yolks or shells, about 8 medium (M) whites; for three batches of 80 g
240 g fine white sugar for the layers; for three batches of 80 g
240 g finely ground raw shelled walnuts, unsalted; for three batches of 80 g, not nut paste
24 g all-purpose flour, type 550; for three batches of 8 g, without dusting or greasing the parchment
Cooked vanilla custard buttercream
300 g milk with 3.2% fat, weighed, including 50 g for the yolks and 250 g to heat
72 g raw egg yolks without whites, about 4 medium (M) yolks; weigh whites and yolks separately, with unused egg parts excluded from the recipe
60 g white sugar for the cream
8 g sugar with real ground Bourbon vanilla
24 g pure cornstarch, not corn flour or ready-made sweetened pudding
200 g unsalted butter with 82% fat, softened and not melted
Sides, white icing and spiderweb
40 g finely chopped raw shelled walnuts for the sides, in addition to the 240 g in the cake layers
30 g ready-made smooth sweetened apricot jam for a thin coating on the top layer
130 g powdered sugar made from 100% sugar, with no added starch
22 g warm water for the icing
20 g dark chocolate with about 60% cocoa to melt for the pattern; any unused chocolate stays outside the cake
Steps
Mix the yolks with the 60 g sugar, vanilla sugar, starch and 50 g cold milk. Heat the remaining 250 g milk until visibly steaming. Slowly pour into the yolks, whisking constantly, then return everything to the saucepan. Cook over medium heat, stirring along the bottom too. Once thickened with clear bubbles appearing, reduce the heat and cook for about another 1 minute, stirring continuously. The base should be smooth and thick like pudding, without raw starch.
Transfer the base to a shallow dish, cover with plastic wrap touching the surface and leave for about 20 minutes. Then refrigerate for about an hour, until completely cold. Before beating, take the base out for 30–45 minutes so it is not refrigerator-cold; the softened butter and base should be at similar temperatures. The butter should yield to a finger, not be liquid. Prepare and bake the layers while the base chills.
Draw one 20 cm circle on the back of each of six parchment sheets. Prepare two baking sheets and preheat the oven to 160°C with the fan on. Divide the layer ingredients into three sets, each with 80 g whites, 80 g sugar, 80 g ground nuts and 8 g flour. Mix the nuts with flour in each set. Whip a fresh batch for each next pair of layers only just before baking, so the foam does not wait through all three rounds.
In a clean dry bowl, beat the first 80 g whites until lightly foamy. Add the first 80 g sugar a spoonful at a time and beat to stiff glossy foam without noticeable sugar crystals. Gently fold in the first set of 80 g nuts and 8 g flour with a spatula. Reach to the bowl bottom and fold without vigorous stirring. Divide into two equal portions of about 124 g. Spread one thin even disk on each of two parchment sheets, exactly to the outline.
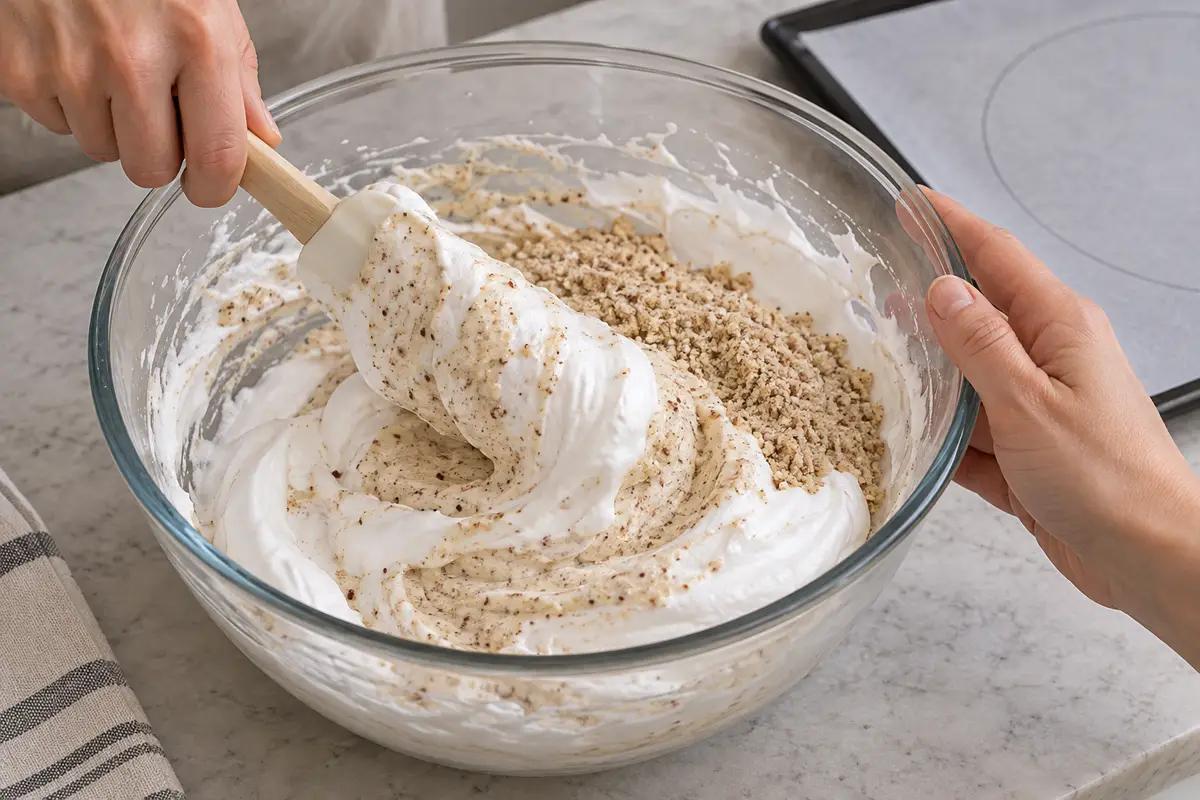
AI-generated Put the two baking sheets on two oven levels. Bake at 160°C with the fan on for about 18–22 minutes; after about 12 minutes, quickly swap the sheets between levels. The layers should be evenly light brown, with dry surfaces and baked edges. Slide the parchment off the sheets and cool completely on racks. Wash and dry the bowl, cool the baking sheets, then freshly prepare the second and third batches in the same way. Bake six disks in all; do not whip the next foam in advance.
Turn the completely cold layers over individually and gently pull the parchment back flat along the surface, supporting each disk. Do not pull the cake upward. Save the most even layer for the top; small cracks in the others will be joined by the cream. Do not cut them with a cake ring and do not trim the edges. All six disks and any small broken pieces go into the cake layers. Do not stack them while still warm.
Beat the softened 200 g butter for about 4–5 minutes, until paler and fluffy. Briefly stir the cooked base, then add to the butter a spoonful at a time, mixing on medium speed until each addition is incorporated. Do not add hot or refrigerator-cold base. The finished cream should be smooth, light and hold a spatula mark. Scrape everything from the dish and divide into six equal portions: five for filling, one for the sides. Do not reserve cream for piped rosettes.
Put the first layer on a flat cake stand and spread with one cream portion. Cover with the second, add another portion and repeat until five cream portions separate all six cake layers. Put the most even disk on top. Fit small broken pieces back into their original places inside the layers. Place each layer gently, without crushing. Use the last, sixth cream portion to thinly smooth only the sides. Leave the top layer without cream.
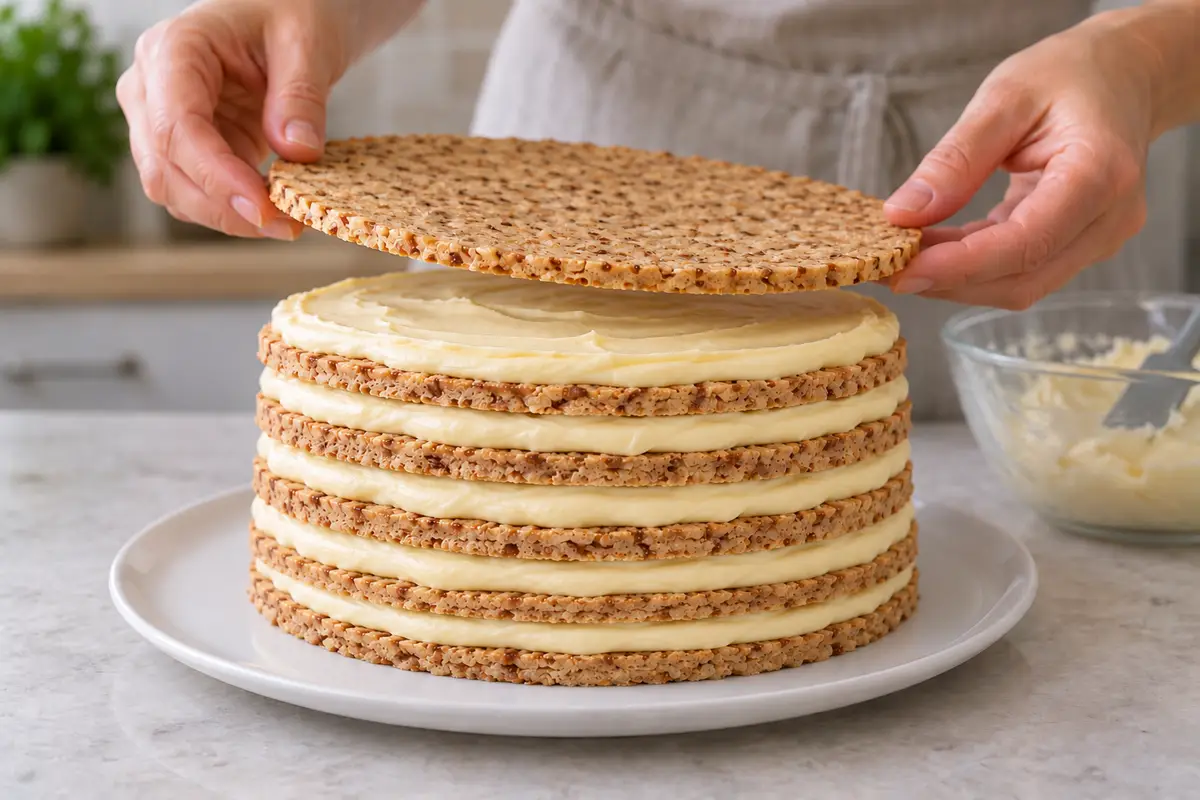
AI-generated Gently press all 40 g chopped nuts into the cream on the sides, collecting any that fall onto the stand and pressing them back on. Gently warm the 30 g apricot jam just until loosened, without adding water. Spread all the jam very thinly on the top cake layer alone, without flooding the sides. Refrigerate for about an hour, until the layers are stable and the cream is clearly firmer.
Melt the 20 g chocolate in a small dry bowl over gently steaming water, without the bottom touching the water. Do not add butter or water. Transfer to a small piping bag or parchment cone. Leave briefly so the chocolate remains fluid but not hot. Have a thin wooden skewer ready. Keep any chocolate left after drawing the pattern separately; you do not have to use all 20 g on the cake.
Sift the 130 g powdered sugar and mix with all 22 g warm water. Beat with a spoon until smooth white icing falls in a wide slow ribbon. Take out the cold cake. Spread all the icing thinly and evenly over the jam layer to the edge, without letting it run down the walnut sides. Immediately move on to the chocolate pattern before the surface begins to set. Do not refrigerate between icing and drawing.
Snip the cone tip to make a small opening. Draw a thin chocolate spiral on the soft icing from the center to the edge, about 1½–2 cm apart. Drag radial lines with the skewer, alternating from the center outward and from the edge inward, wiping it after every stroke. Touch only the surface; do not cut through the layers. Set the bag with leftover chocolate aside, outside the cake; do not drizzle it over the sides. Do not add other decorations.
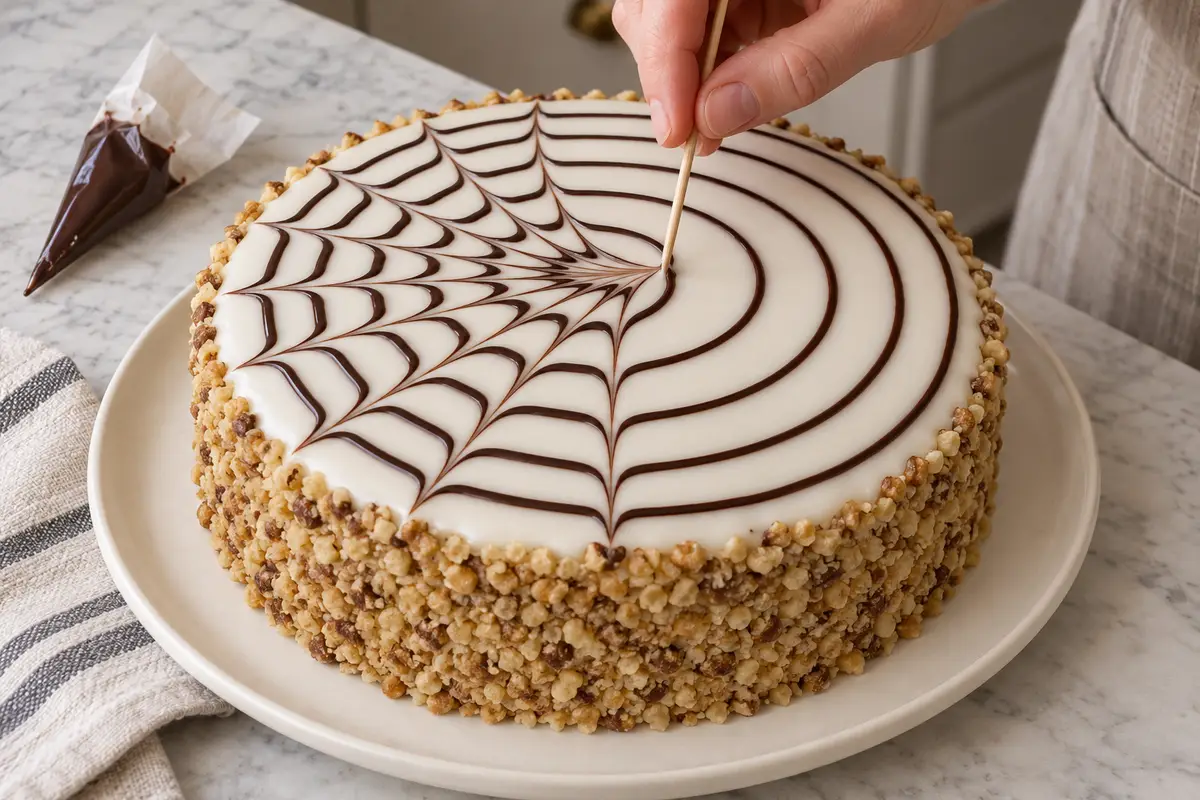
AI-generated Refrigerate the cake for at least 4 hours, preferably until the next day. Cover so the cover does not touch the pattern. The layers should soften slightly from the cream and the icing set. Take out about 20 minutes before serving and cut into 12 servings with a long sharp knife, warmed in warm water and wiped dry. Serve the full cross-section with the walnut sides. Keep covered in the refrigerator for up to 3 days; do not leave the cake in a warm place for long.
Estimated nutrition

Rate this recipe
0 ratings
Comments