
AI-generated
Yemas de Santa Teresa – Spanish egg yolk sweets
Log in or create a free account to save recipes.
Source: https://recipheon.com/en/recipes/desserts/yemas-de-santa-teresa-spanish-egg-yolk-sweets
About this recipe
Yemas de Santa Teresa are small Spanish sweets associated with Ávila. Their center is a delicate cooked egg yolk mixture with sugar syrup, covered in a thin layer of powdered sugar. Gentle heating and constant stirring are key: the mixture should thicken, stay smooth and begin to pull away from the sides of the saucepan. Only after thorough chilling can you shape it into little balls. This simple home version needs four ingredients and a small heavy-bottomed saucepan. The batch makes twelve sweets, or six servings of two balls. Serve in small paper cups, without extra sauce or cream.
Ingredients
For 6 servings, 12 small balls
120 g raw egg yolks without whites or shells, about 6 large yolks
100 g white sugar for the syrup
50 g water for the syrup, weighed on a scale
20 g powdered sugar for shaping and coating
Steps
Set out a small heavy-bottomed saucepan, a whisk, a spatula, a shallow dish for chilling the mixture and 12 small paper cups. Weigh the yolks after separating them from the whites and shells. Lightly beat them in a bowl just to combine, without whipping into a foam. Measure the sugar, water and powdered sugar separately. Measuring the ingredients and setting up take about 10 minutes.
Put the white sugar in the saucepan, add all the water and heat gently until the sugar dissolves. Then simmer gently for about 5–10 minutes until the syrup is thick and colorless. Lift a little on a spoon and let it drip over the pan: the ready syrup should briefly form a thin, short thread rather than run like water. Check it on the spoon, without touching the hot syrup with your fingers. Remove from the heat before it starts turning caramel-colored.
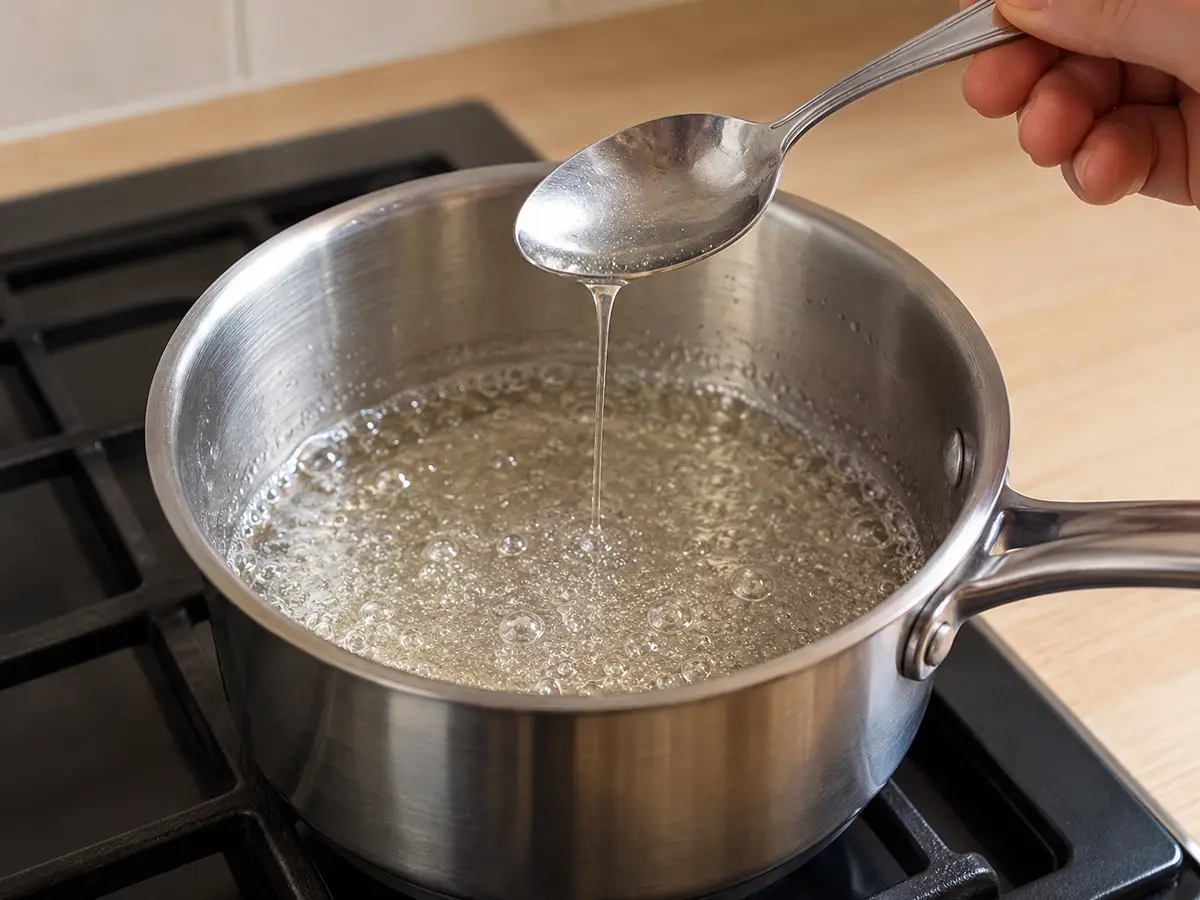
AI-generated Wait briefly for the vigorous syrup bubbles to subside. Pour it in a thin stream into the yolks, whisking constantly and vigorously. Scrape all the syrup from the saucepan with the spatula, then return the combined mixture to the same pan. Combining the yolks with hot syrup is the start of further cooking; at this stage, the mixture is not yet ready to shape.
Heat over low heat, stirring constantly and scraping the bottom and sides thoroughly. This usually takes about 5–10 minutes. The mixture should become a smooth, thick paste that does not pour, gathers around the spatula and pulls away from the pan sides. A spatula drawn across the bottom should leave a visible trail briefly. Do not turn the heat up sharply, so dry lumps of yolk do not form. Stop cooking when these cues are reached; allow about 20 minutes in total for making the syrup and cooking the mixture.
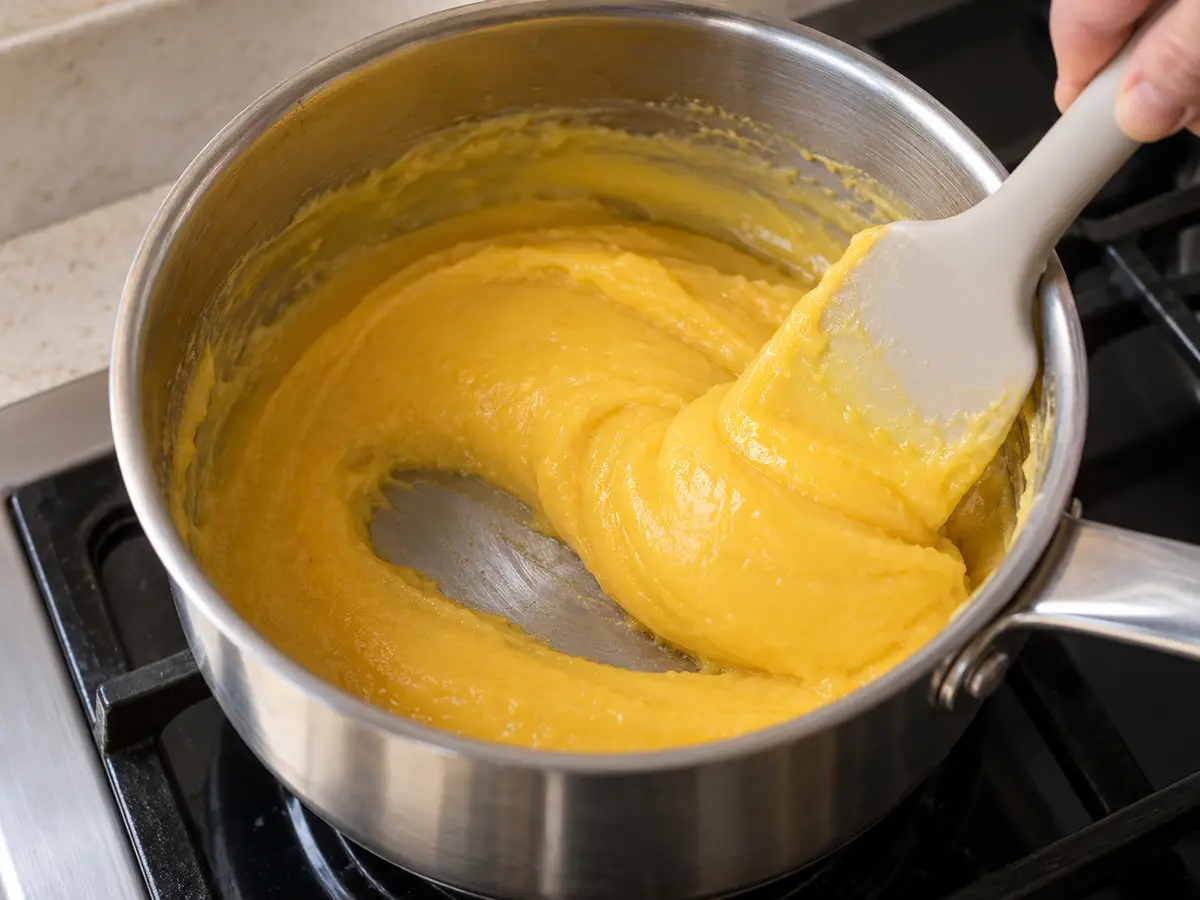
AI-generated Transfer all the cooked mixture to a shallow dish and cover with food wrap touching the surface. Cool briefly for about 15 minutes, then refrigerate for about 3 hours until completely cold and ready to shape. Chill longer if it is still warm or too soft. Divide all the mixture into 12 equal portions. Dust your hands with some of the measured powdered sugar and gently shape balls about 3 cm wide; slight stickiness is natural. Do not add oil or flour.
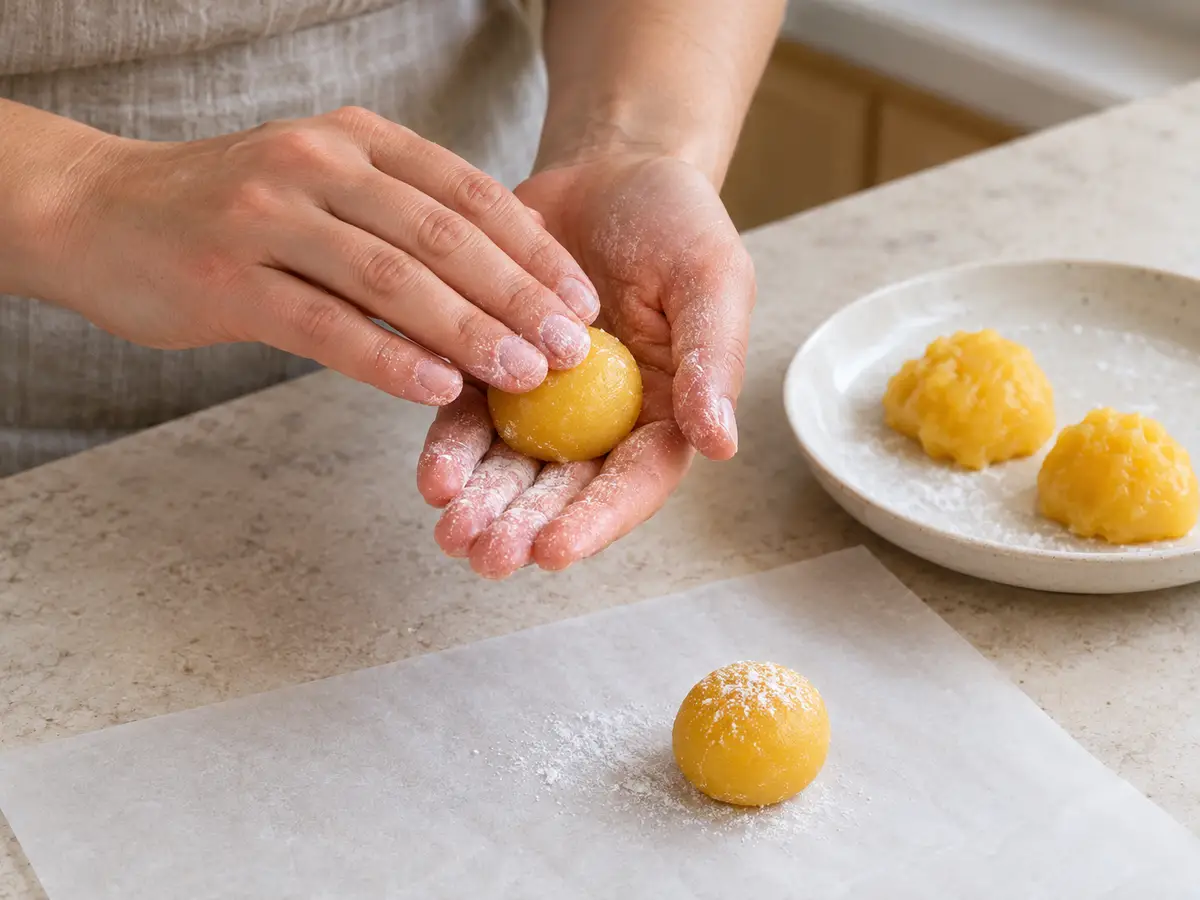
AI-generated Coat the balls lightly in the rest of the same 20 g powdered sugar and place in paper cups. Shaping and coating together take about 10 minutes. Serve 2 per portion and keep covered in the refrigerator until serving. Allow about 3 hours and 55 minutes in total: 20 minutes of preparation, 20 minutes of cooking and about 3 hours and 15 minutes of cooling and chilling. The cold mixture’s texture matters more than the exact minute you take it out of the refrigerator.
Estimated nutrition

Rate this recipe
0 ratings
Comments