
AI-generated
Ciabatta — Italian Bread with a Crisp Crust and Open Crumb
Log in or create a free account to save recipes.
Source: https://recipheon.com/en/recipes/breakfast/ciabatta-italian-bread-with-a-crisp-crust-and-open-crumb
About this recipe
Ciabatta is an elongated Italian bread with a crisp crust and a soft interior full of irregular air pockets. This version uses no preferment and rises the same day, with several rounds of folding in the bowl to strengthen the dough. Choose white wheat bread flour with about 12–13% protein; ordinary cake flour will not provide similar strength in such a wet dough. The stickiness is intentional: do not add flour while working the dough, and use a scraper when dividing it to preserve the bubbles. The recipe makes two loaves, or eight portions of a quarter loaf each. Allow about five hours, including rising and cooling, and also use the dough's appearance as your guide.
Ingredients
Dough and baking preparation
530 g dry white wheat bread flour with about 12–13% protein; 500 g for the dough and 30 g for dusting, with loose excess dusting flour left on the work surface and parchment
550 ml drinking water; 400 ml lukewarm water for the dough and 150 ml for creating steam in the oven, this second portion does not go into the dough
3 g instant dry baker's yeast
10 g fine salt
Steps
Mix 500 g of flour, the instant yeast, and the salt in a large bowl. Pour in 400 ml of lukewarm, not hot, water and stir with a sturdy spoon for about 3–4 minutes, until no pockets of dry flour remain. The dough will be very sticky and soft; scrape it down from the sides with a flexible scraper, cover the bowl, and leave for 30 minutes in an undisturbed spot at about 22–24°C.
Slide a flexible scraper under the edge of the dough, lift it, stretch it gently, and fold it into the center. Rotate the bowl and repeat about 8 times, until the dough begins to offer slight resistance and comes together into a more elastic mass. Do not tear it, and do not dust it with flour; the scraper lets you work without grabbing the sticky dough with your hands. Cover again and leave for 30 minutes.
Repeat the same set of folds, wait another 30 minutes, and fold the dough for the third and final time. Then leave it covered for about 60 minutes without moving it; the total rise in the bowl, timed from the initial mixing, takes about 2½ hours. The dough is ready when it has grown noticeably, is approaching twice its original volume, has bubbles around the edges, and jiggles slightly when you move the bowl. If it is still dense and has few bubbles, allow about another 20–30 minutes; a cool kitchen makes this stage take longer.
Scatter about 20 g of the reserved 30 g of flour over the work surface. Carefully turn out the dough with the help of a scraper and gently stretch just the edges into a rectangle about 24 × 28 cm, without pressing down on the center. Dust the top with half of the remaining flour and cut the rectangle lengthwise into two similar strips. Do not knead the pieces, and do not roll them up tightly: the bubbles you preserve will create the open crumb.
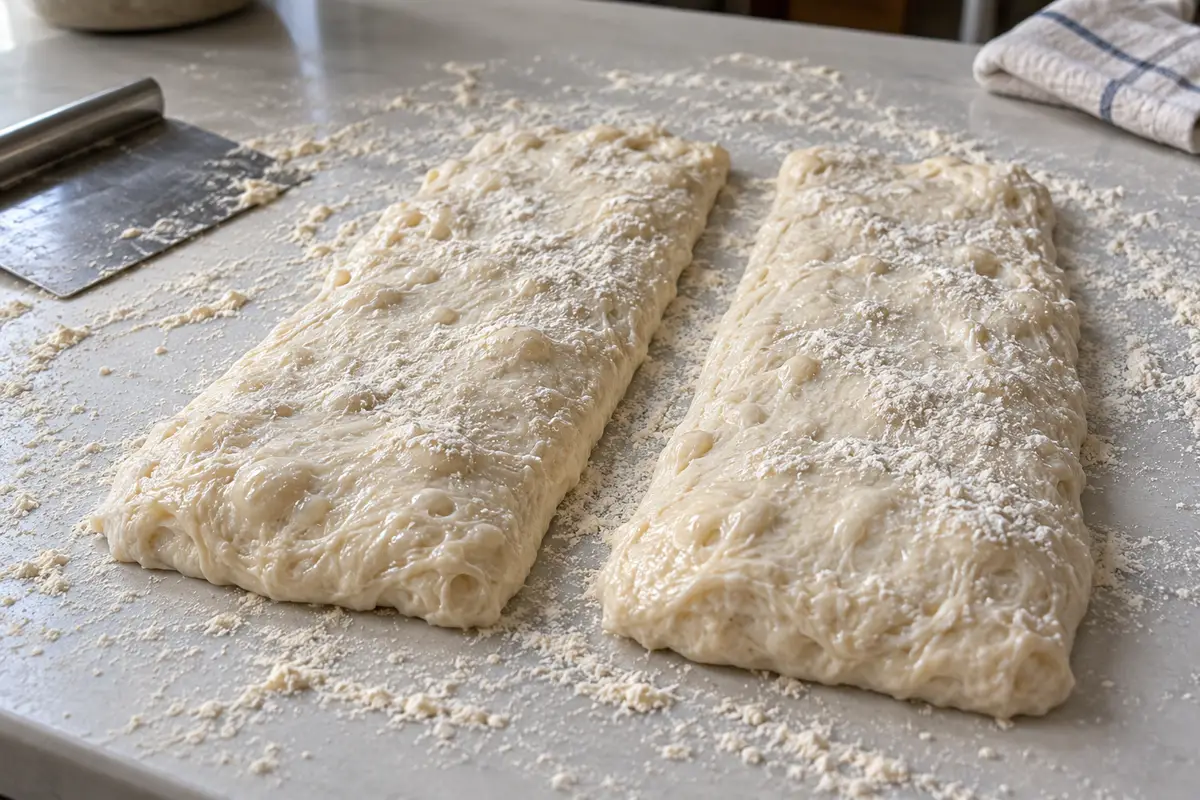
AI-generated Place a sheet of parchment paper, sized to fit a large baking sheet and rated for 230°C, on a flat board. Dust it with the rest of the measured flour. Support each strip with two wide scrapers, transfer it to the parchment, and gently adjust it to about 28 cm long; leave about 7 cm between the loaves. Cover them with an inverted deep baking pan or a container that does not touch the dough and leave for about 45–60 minutes. They should become noticeably puffy, and a shallow fingertip mark near an edge should slowly spring back rather than disappear immediately.
At the start of the final rise, preheat a conventional oven (no fan) to 230°C. Heat a large, flat baking sheet on the middle rack and put a small, empty metal roasting pan on the rack below for steam; the oven and pans should heat for at least 35 minutes. Just before baking, bring the reserved 150 ml of water to a boil. Use a metal pan for steam, not glass, and do not pour water directly onto the oven floor.
Using oven mitts, take out the hot baking sheet and set it on a stable support, slide the parchment with the loaves onto it, and return it to the oven immediately. Carefully pour 150 ml of boiling water into the lower roasting pan, protecting your hands with oven mitts and keeping your face away from the steam, then close the door. Bake for 15 minutes at 230°C, briefly open the door to release the steam, lower the temperature to 220°C, and bake for about 15–20 minutes more, until the crust is distinctly golden brown and the bottom is firm and browned. Leave the empty or still damp roasting pan in the switched-off oven to cool.
Move the loaves off the parchment directly onto a wire rack and leave uncovered for at least 45 minutes, until the centers are no longer hot. Do not slice them straight after baking, as the moist crumb may become gummy under the knife. Once cool, brush away loose flour from the bottoms and cut each loaf into four portions; the cut surfaces should show irregular holes and delicate, elastic crumb walls.
Estimated nutrition

Rate this recipe
0 ratings
Comments